5 - Experimental Digital Fabrication
Pretty much right from the start, my group members (Garrison, Wonho, Lu) and I thought that finding a way to merge CAD with craft would be cool for this project. With this in mind, we did some brainstorming, and we eventually settled on using the prusa machine to create sgrafitto designs on clay. After deciding we would use clay tiles for the base, we did a deeper brainstorm into the possibilities with sgrafitto and came up with some pretty ambitious ideas:

Made by Wonho and Garrison!


Finding out that the tiles weren't as flat as I thought they were--if we had more time we would've worked on making them flatter, maybe with a high grit sandpaper.

Experimenting with tool depth and realizing that it messed with the curve paths if it was too deep.

Way better attempt! This is where we realized I made the tiles 4x4 inches rather than 3x3.

Found the perfect tool depth here, but the tile just wasn't flat enough.


- Programming the machine to make the attached tool ‘wipe’ clay shavings off of itself
- Experiment with making the machine paint the slip onto the clay
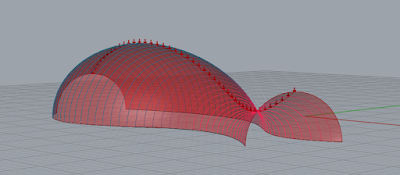
- Sgrafitto on flat surfaces (tiles) vs curved forms
- Different shaped tiles
- Laser cutting on the tiles
- Different levels of dryness for the clay
- Experimenting with tools not typically used for sgrafitto
- Carving out sections of the tiles and using sgrafitto on the raised parts (visually, think lino blocks)
As exciting as these ideas were, they were ultimately too ambitious for this project, and time restrictions as well as a possible group miscommunication resulted in us having to pocket these ideas—I’d like to experiment with this again in the future, though.
When it came to designs, we were drawn to the idea of computer-y aesthetics that contrast the idea of using clay, a medium so heavily associated with nature/the earth. We did stray from this initial idea a bit in terms of visual aesthetic (though again, I’d like to come back to it in the future if I get the opportunity), but we still created the designs we used in Rhino. These were the designs we decided to work with (we didn't get to use most of them):
Made by Wonho and Garrison!
The first challenge we ran into was making sure we would have enough time to make the clay tiles (20 3x3in tiles). The last day for wet clay was March 25th, and my schedule only allowed me to make the tiles on that day, so I had to rush all of them out at once (we ultimately didn’t even end up using all of them because of time). We then had to let the tiles dry to the leather hard stage in order to apply the slip for sgrafitto, a process that can’t be done too quickly to avoid excessive warping or cracking.
The next challenge we encountered was a misunderstanding when it came to what we were doing with the clay tiles. I’m still not even entirely sure what happened and if I had missed something important, and though I tried to take it in stride, I found it a little stressful and worried I was messing the project up. I'm glad things worked out in the end though!!
The final major challenge was us underestimating how long it would take to get the machine set up and the tiles etched into. But it was a welcome challenge, and finally getting to go through the process of using the prusa to do sgraffito was so fun and interesting. The grasshopper file made it pretty straightforward, but we did experiment with how deep the tool should go into the clay and with things like how high it lifts before moving to the next point.
Here's some of the process + final results :) (Photos and videos taken by Lu)
Here's some of the process + final results :) (Photos and videos taken by Lu)
Holding the tiles in place with pieces of wet clay--the room was dry so I would have to get new pieces every time we replaced the tile. This technique is also used in ceramics for securing forms to pottery wheels.
Finding out that the tiles weren't as flat as I thought they were--if we had more time we would've worked on making them flatter, maybe with a high grit sandpaper.
Experimenting with tool depth and realizing that it messed with the curve paths if it was too deep.
Way better attempt! This is where we realized I made the tiles 4x4 inches rather than 3x3.
Found the perfect tool depth here, but the tile just wasn't flat enough.
Can't wait to come back to this idea again one day. :D

Comments
Post a Comment